
Crear un widget del tiempo utilizando Openweather y PHP
Openweather es un servicio online de consulta de información sobre el tiempo que funciona mediante una API.
Tiene planes gratis y planes de pago. Según nuestras necesidades, utilizaremos uno u otro.
Crear cuenta
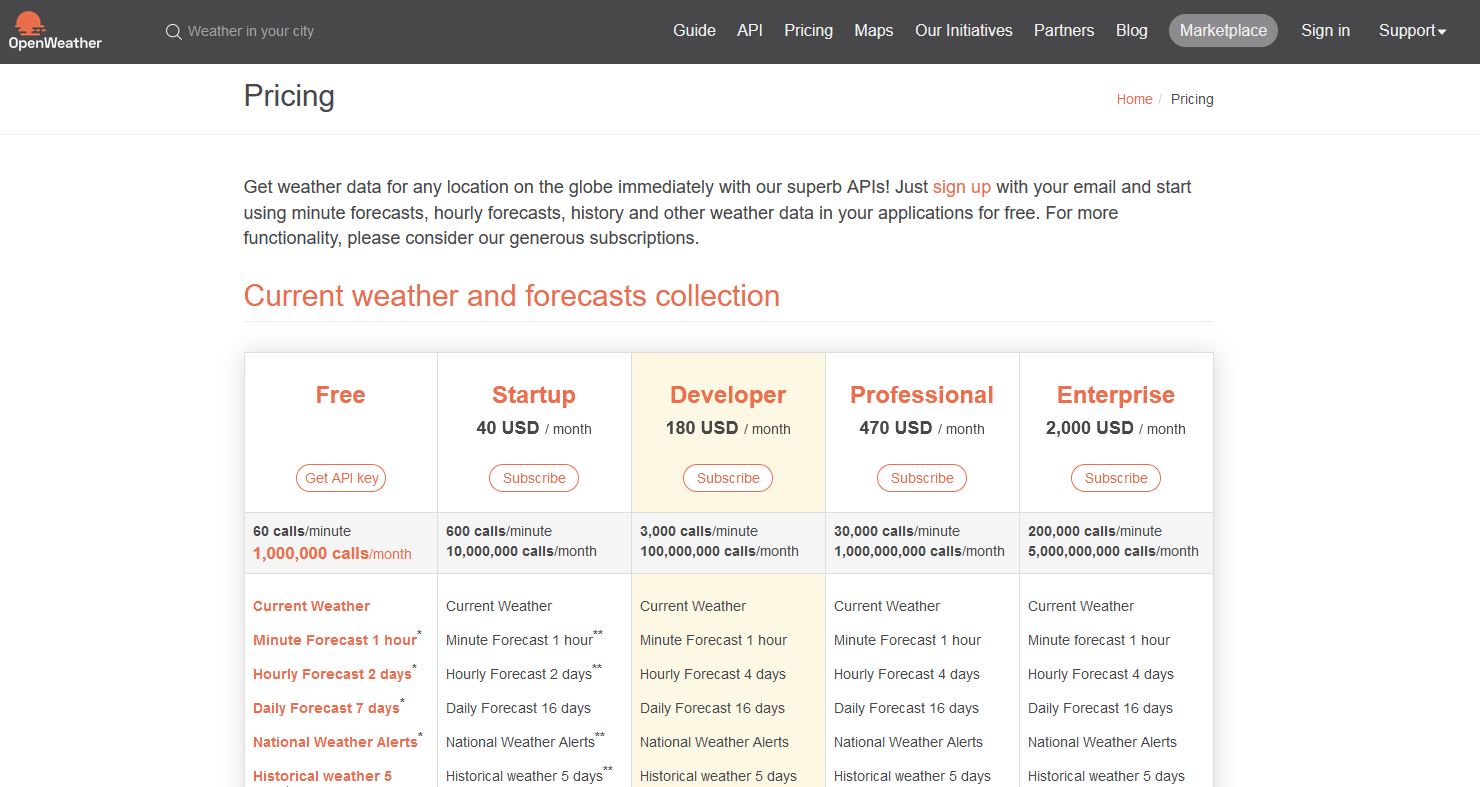
Para este ejemplo, crearemos una cuenta gratuíta.
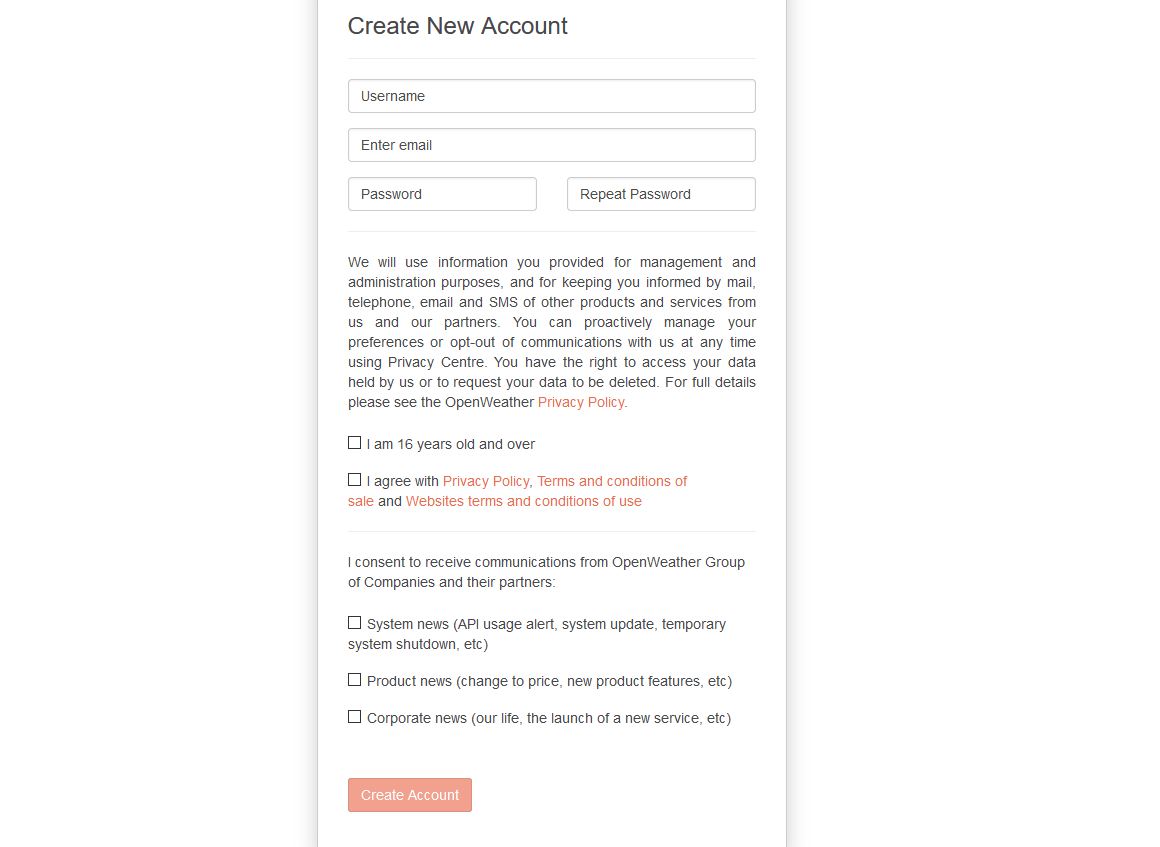
Deberemos cubrir los datos de registro y nos enviarán un link de verificación a nuestro email.
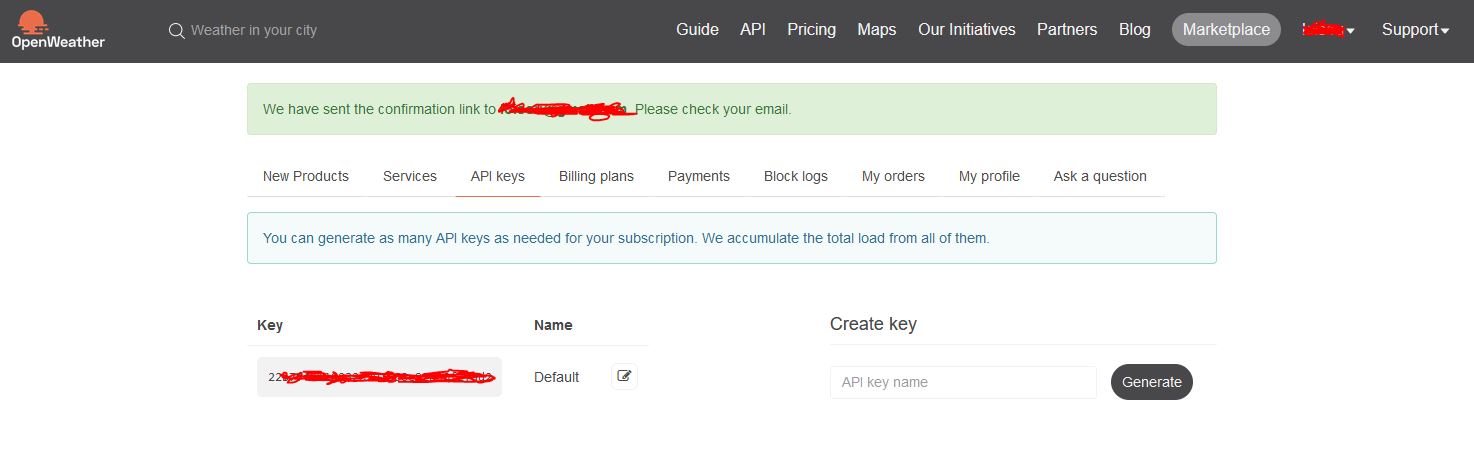
Generar API
Al crear nuestra cuenta, por defecto se nos generará una API KEY.
Podremos utilizar esta, o generar una nueva en la parte derecha. Además podremos asignarle un nombre a cada una de ellas.
Código de ejemplo
<?php

/* Set vars */
$key_api = "THE APY KEY";
$id_city = 6360222;
$owApiUrl = "http://api.openweathermap.org/data/2.5/weather?id=" . $id_city . "&lang=en&units=metric&appid=" . $key_api;

/* Curl connection */
$ch = curl_init();
curl_setopt($ch, CURLOPT_HEADER, 0);
curl_setopt($ch, CURLOPT_RETURNTRANSFER, 1);
curl_setopt($ch, CURLOPT_URL, $owApiUrl);
curl_setopt($ch, CURLOPT_FOLLOWLOCATION, 1);
curl_setopt($ch, CURLOPT_VERBOSE, 0);
curl_setopt($ch, CURLOPT_SSL_VERIFYPEER, false);
$response = curl_exec($ch);
curl_close($ch);

/* Decode and check cod */
$data = json_decode($response);
if($data->cod != 200) exit("An error has occurred: ".$data->message);

?>

<html>
<head>
	<title>Simple example of use OpenWeatherMap + PHP</title>
</head>
<body>
	<div class="widget">
		<h3>Weather Forecast</h3>
		<div class="content">
			<h2><?php echo $data->name; ?></h2>
		</div>

		<div class="representation">
			<img src="http://openweathermap.org/img/w/<?php echo $data->weather[0]->icon; ?>.png" />
			<p><?php echo ucwords($data->weather[0]->description); ?></p>
		</div>

		<div class="content-full">
			<hr/>
			<div class="half">
				<b>Min. temp. : </b> <span class="min-temp"><?php echo $data->main->temp_min; ?>°C</span><br/>
				<b>Min. temp. : </b> <span class="max-temp"><?php echo $data->main->temp_max; ?>°C</span><br/>
			</div>
			<div class="half">
				<b>Humidity: </b><?php echo $data->main->humidity; ?> %<br/>
				<b>Wind: </b><?php echo $data->wind->speed; ?> km/h<br/>
			</div>
			<p><small>Consulted at: <?php echo date('H:i:s d/m/Y'); ?></small></p>
		</div>
	</div>

	<style>
	*{
		font-family: 'Verdana';
	}

	.widget{
		float: left;
		padding: 5px 25px;
		max-width: 450px;
		background-color: #f7f7f9;
		border: 2px solid #d0d0d0;
		border-radius: 6px;
	}

	.widget{
		font-size: 10px;
	}

	.widget h2{
		font-size: 22px;
		color: #4f9fcf;
	}

	.widget h3{
		font-size: 14px;
	}

	.widget b{
		font-size: 12px;
	}

	.widget hr{
		border-color: #d0d0d0;
	}

	.widget .content{
		float: left;
		width: 65%;
		margin-right: 5%;
	}

	.widget .representation{
		float: left;
		width: 30%;
	}

	.widget .content-full{
		float: left;
		width: 100%;
	}

	.widget .half{
		float: left;
		width: 45%;
		margin-bottom: 10px;
	}
	.widget .half:first-child{
		margin-right: 5%;
	}
</style>
</body>
</html>
En el código, deberemos poner la API KEY generada desde nuestro panel de control de la plataforma Openweather.